> ## Documentation Index
> Fetch the complete documentation index at: https://docs.awazindia.ai/llms.txt
> Use this file to discover all available pages before exploring further.
# App Creation on Facebook
> This page describes everything about App Creation on Facebook
## Steps to Get a App Creation on Facebook
1. Visit the Developer Portal
* Go to developers.facebook.com. Log in with your Facebook account.
2. Enter Mobile Number
* Input your mobile number to receive a confirmation code via SMS or WhatsApp.
* Enter the received code and continue.
3. Account Verification
* Navigate back to Facebook.
* Click on the "Get Started" button to verify your account.
* Confirm your email address and select your role.
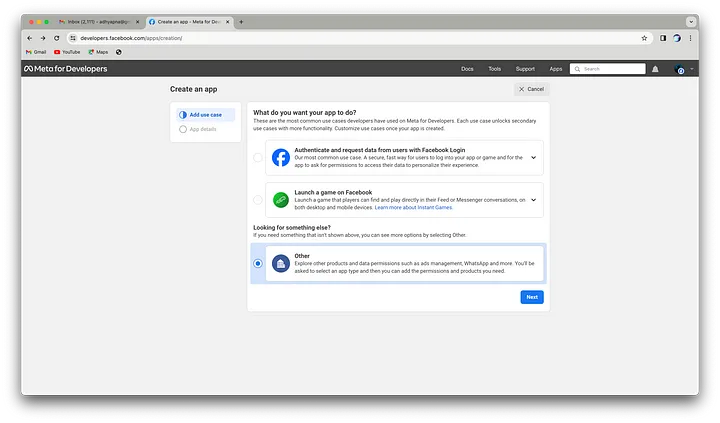
4. Create an App
* Click on "Create App."
* Select your use case. Choose "Other" as per your preference.
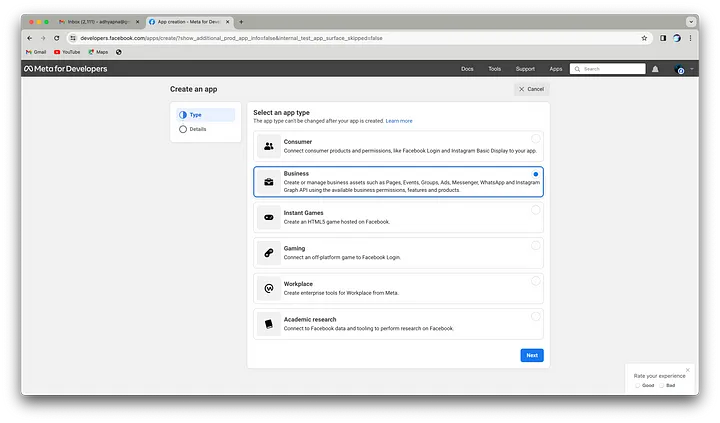
 * Choose an app type; select "Business" and click "Next."
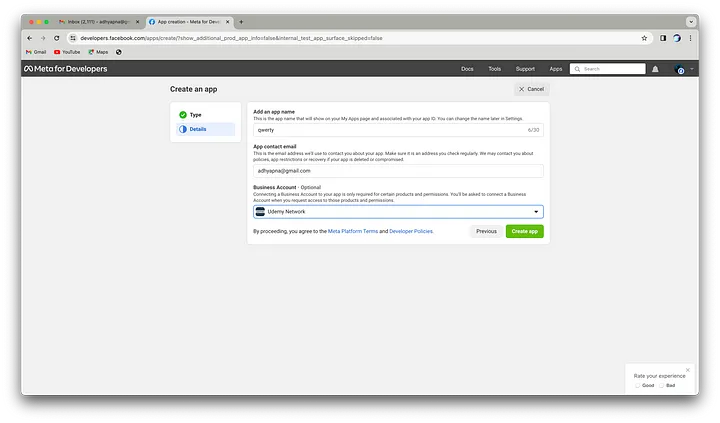
 * Add an app name (e.g., "AIDemo"), enter your contact email, and provide your business portfolio optionally.
* Click "Create."
* Add an app name (e.g., "AIDemo"), enter your contact email, and provide your business portfolio optionally.
* Click "Create."
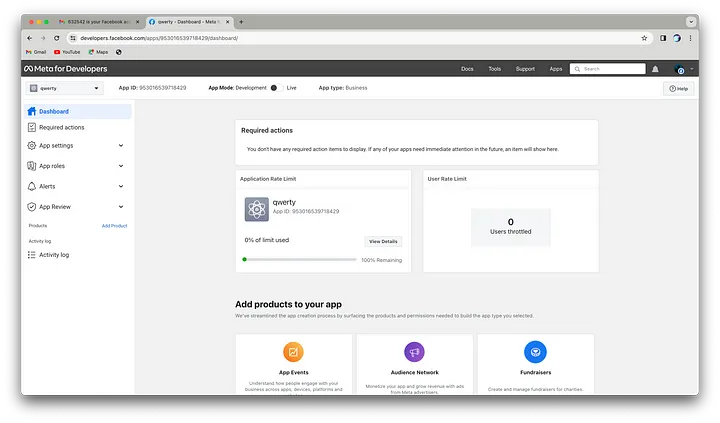
 5. Security Verification
* For security purposes, re-enter your password to continue.
* After submission, you will be redirected to the dashboard of your created app.
5. Security Verification
* For security purposes, re-enter your password to continue.
* After submission, you will be redirected to the dashboard of your created app.
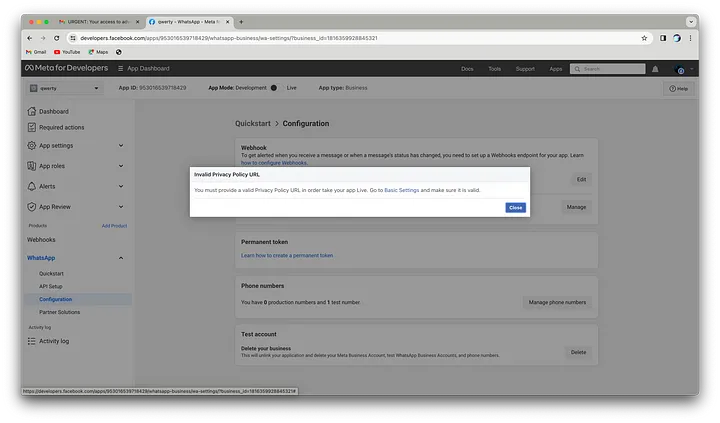
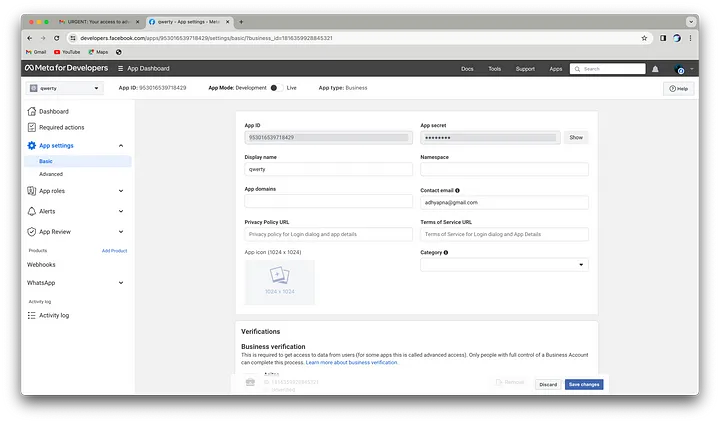
 6. Configure Basic Settings
* Set up the basic settings for your app, including:
* Privacy Policy URL
* Terms of Service URL
* App Category
Once configured, click on the dashboard to find your App ID and Secret. These credentials are essential for integrating your app with WhatsApp.
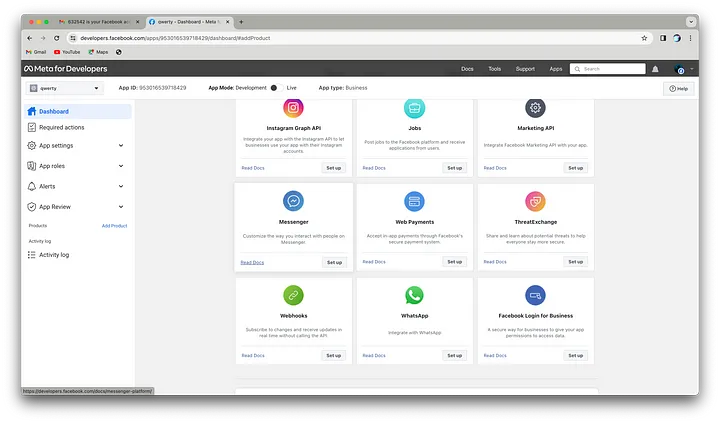
7. Add Product
* Click on "Add Product."
* Select "WhatsApp" and click on the "Setup" button.
6. Configure Basic Settings
* Set up the basic settings for your app, including:
* Privacy Policy URL
* Terms of Service URL
* App Category
Once configured, click on the dashboard to find your App ID and Secret. These credentials are essential for integrating your app with WhatsApp.
7. Add Product
* Click on "Add Product."
* Select "WhatsApp" and click on the "Setup" button.
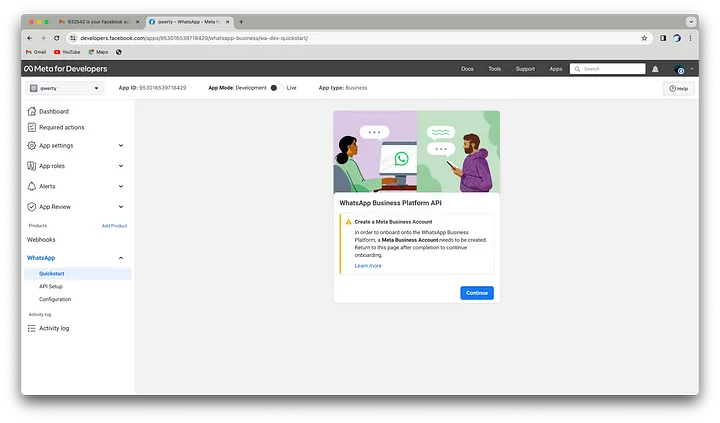
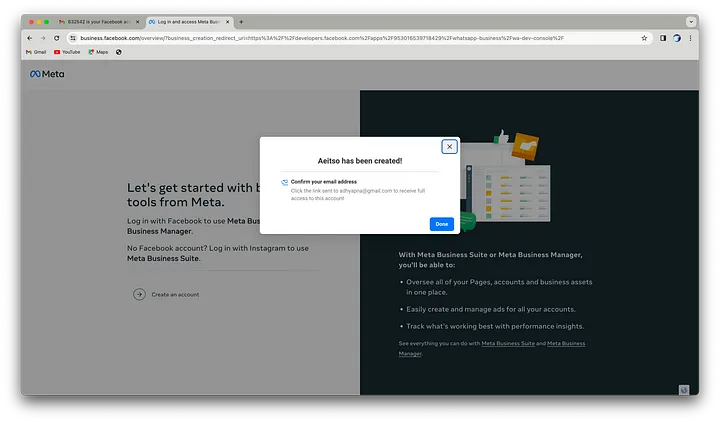
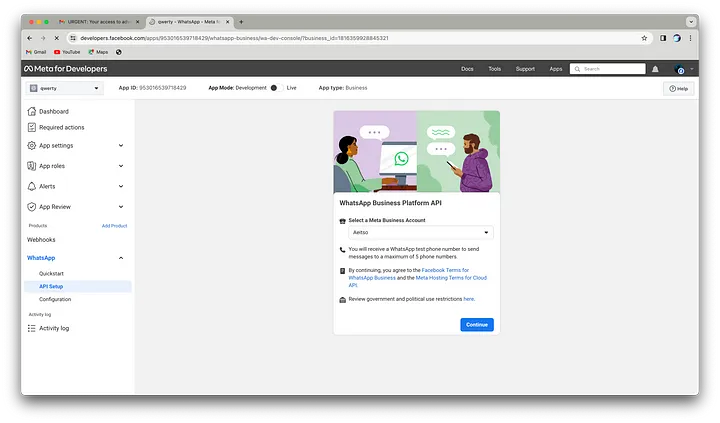
 8. Create a Meta Business Account
* Click “Continue” to be redirected to the Meta Business Portal.
8. Create a Meta Business Account
* Click “Continue” to be redirected to the Meta Business Portal.
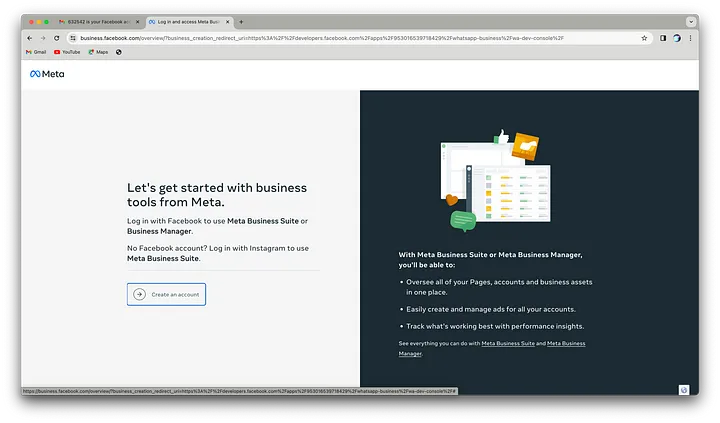
 * Click on “Create Account.”
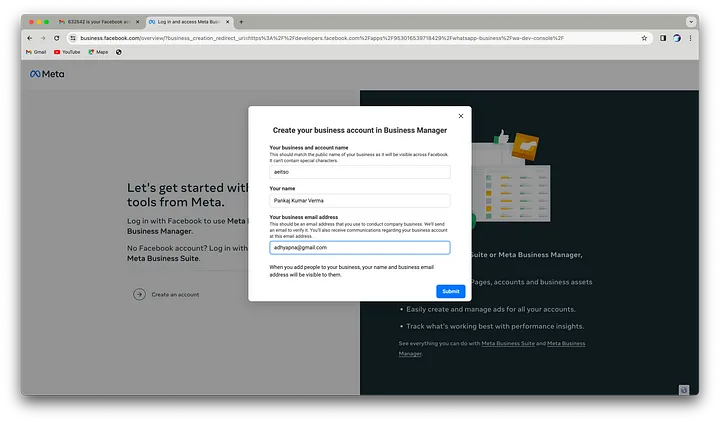
 * Fill in the required details:
* Business Name
* Your Name
* Business Email
* Fill in the required details:
* Business Name
* Your Name
* Business Email
 * Click “Done” to complete the account creation process.
 9. Return to the Developer Portal
* After creating your Meta Business Account, you will be welcomed back to the Developer Portal.
clicking “Continue,” the API Setup page for WhatsApp unveils itself.
9. Return to the Developer Portal
* After creating your Meta Business Account, you will be welcomed back to the Developer Portal.
clicking “Continue,” the API Setup page for WhatsApp unveils itself.
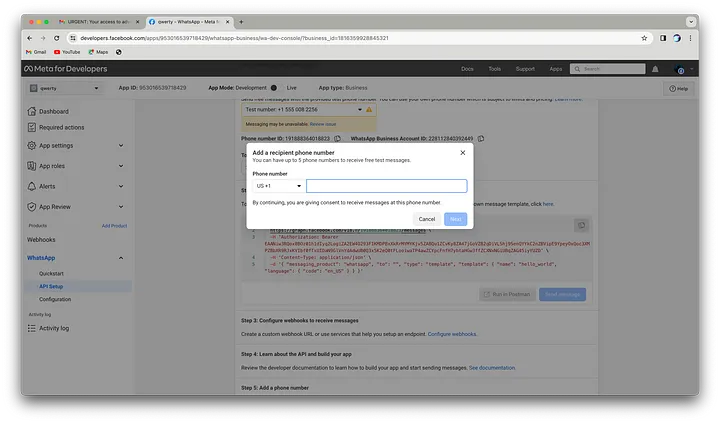
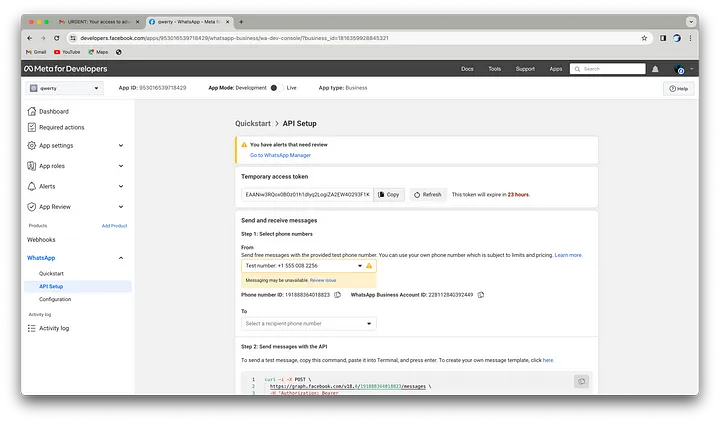 10. Send a Test Message
* Add a recipient's phone number.
10. Send a Test Message
* Add a recipient's phone number.
 * Use a temporary token to test the WhatsApp API.
* Click “Send Message.”
* Use a temporary token to test the WhatsApp API.
* Click “Send Message.”
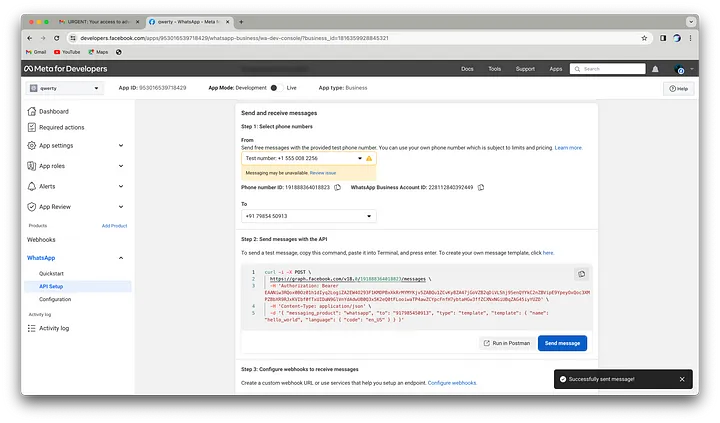 * Expect a toast notification confirming the message was sent successfully.
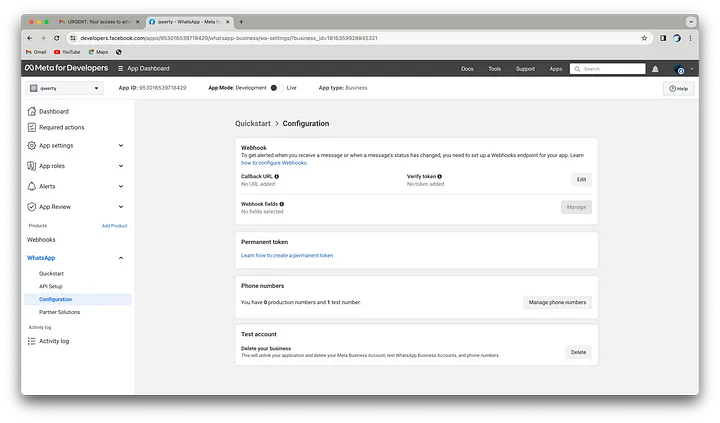 11. Set Up the Webhook Endpoint
* Navigate to the configuration section.
11. Set Up the Webhook Endpoint
* Navigate to the configuration section.
 * Input your webhook URL and permanent token.
* Click “Verify and Save” to establish the connection.
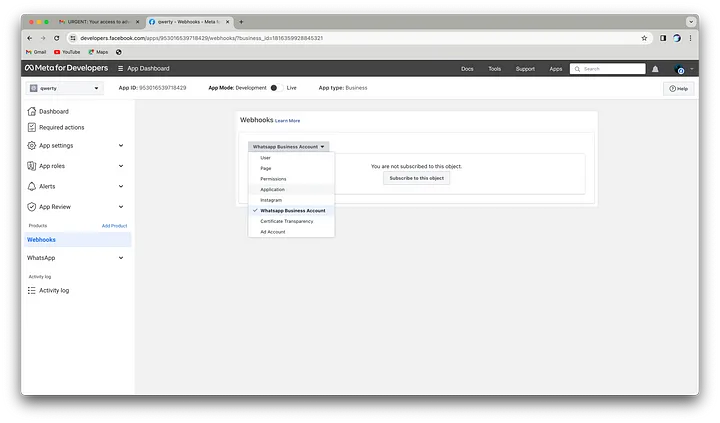
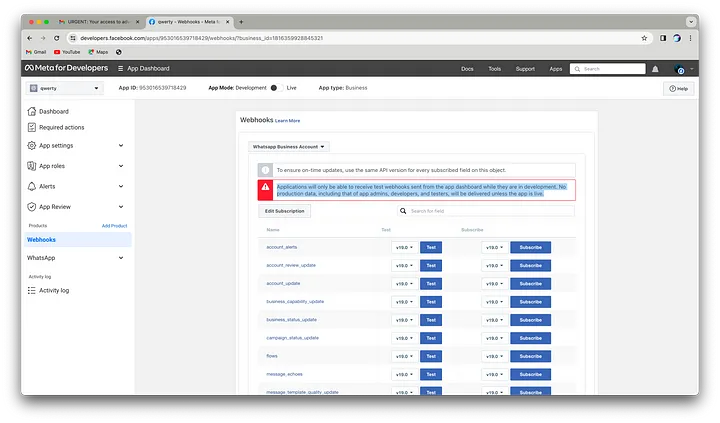
12. Configure WhatsApp Business Account
* Go to the webhooks section.
* Select the WhatsApp Business Account option.
* Input your webhook URL and permanent token.
* Click “Verify and Save” to establish the connection.
12. Configure WhatsApp Business Account
* Go to the webhooks section.
* Select the WhatsApp Business Account option.
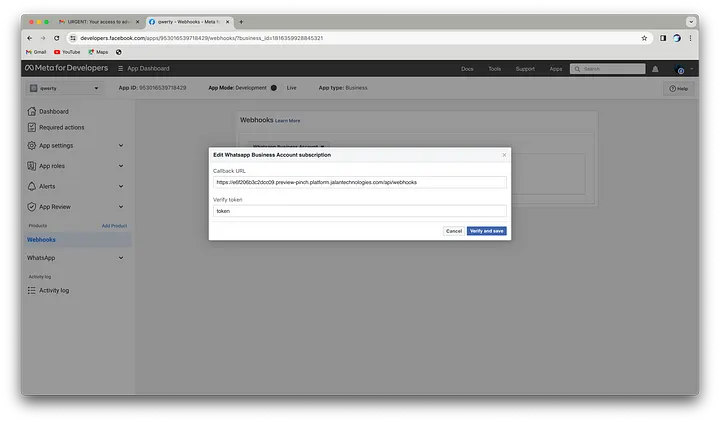 * Enter your webhook and token.
* Click “Verify and Save” to complete the setup.
* Enter your webhook and token.
* Click “Verify and Save” to complete the setup.
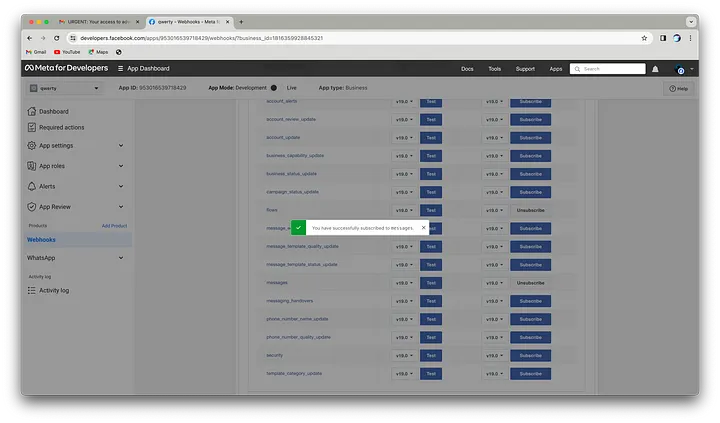 13. Access Object Fields
* Once verified, explore the object fields your webhook can subscribe to.
Test and subscribe to fields to tailor your integration.
13. Access Object Fields
* Once verified, explore the object fields your webhook can subscribe to.
Test and subscribe to fields to tailor your integration.
 14. Consult Documentation
Visit the official WhatsApp Business API documentation for detailed guidance on setting up webhooks.
14. Consult Documentation
Visit the official WhatsApp Business API documentation for detailed guidance on setting up webhooks.
 15. Transition to Live Environment
Toggle your app from testing to live mode to receive logs.
Fill in basic details, including Privacy Policy and Terms of Service URLs.
15. Transition to Live Environment
Toggle your app from testing to live mode to receive logs.
Fill in basic details, including Privacy Policy and Terms of Service URLs.
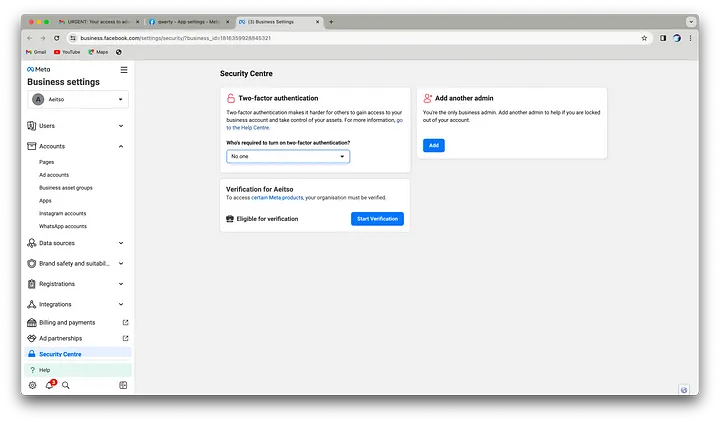
 16. Business Verification
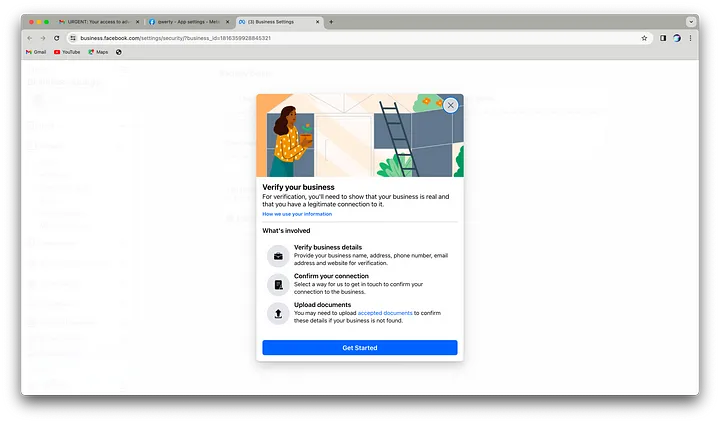
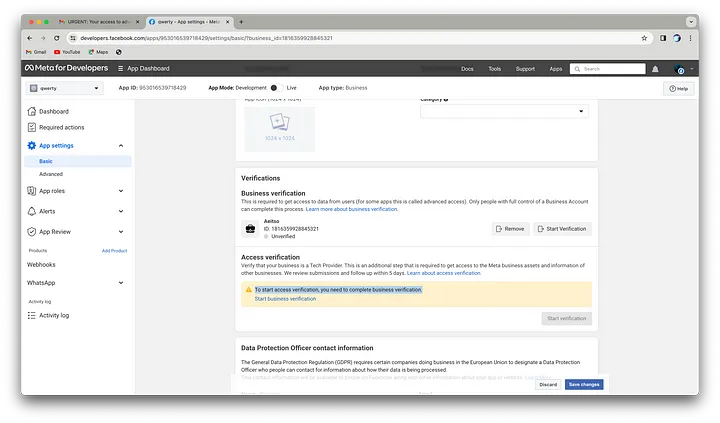 Click “Start Verification” in the Meta Business Portal.
 Provide essential details, including the founder or CEO’s profile and relevant documents.
Upload documents as instructed.
Provide essential details, including the founder or CEO’s profile and relevant documents.
Upload documents as instructed.
 17. Await Verification
Expect verification to be completed within 2–4 hours, up to a maximum of 48 hours.
18. Unlock Meta Flow
After verification, gain access to Meta Flow for enhanced messaging capabilities.
Congratulations!
You've successfully integrated the WhatsApp API and verified your business! Now, you're ready to explore further innovations.
17. Await Verification
Expect verification to be completed within 2–4 hours, up to a maximum of 48 hours.
18. Unlock Meta Flow
After verification, gain access to Meta Flow for enhanced messaging capabilities.
Congratulations!
You've successfully integrated the WhatsApp API and verified your business! Now, you're ready to explore further innovations.